Setting up
Adding a camera
Add IP cameras, video doorbells and the Loxone Intercom: ONVIF camera search, RTSP and MJPEG addresses by brand, output size, detection zones.
On this page
FaceStream reads any camera that serves RTSP or MJPEG, most IP cameras, video doorbells and door stations, the Loxone Intercom. You can type its address, or let FaceStream look for cameras on your network and fill everything in.
Every camera is handled on its own: its own stream, its own recognition settings, its own visits. How many cameras you can add depends on the edition, one in Free, three in Pro.
Search for cameras
Camera → Add camera opens a dialog that starts searching straight away. On an empty camera page, Search for cameras does the same. FaceStream searches only when you open the dialog, never in the background and never on a schedule.
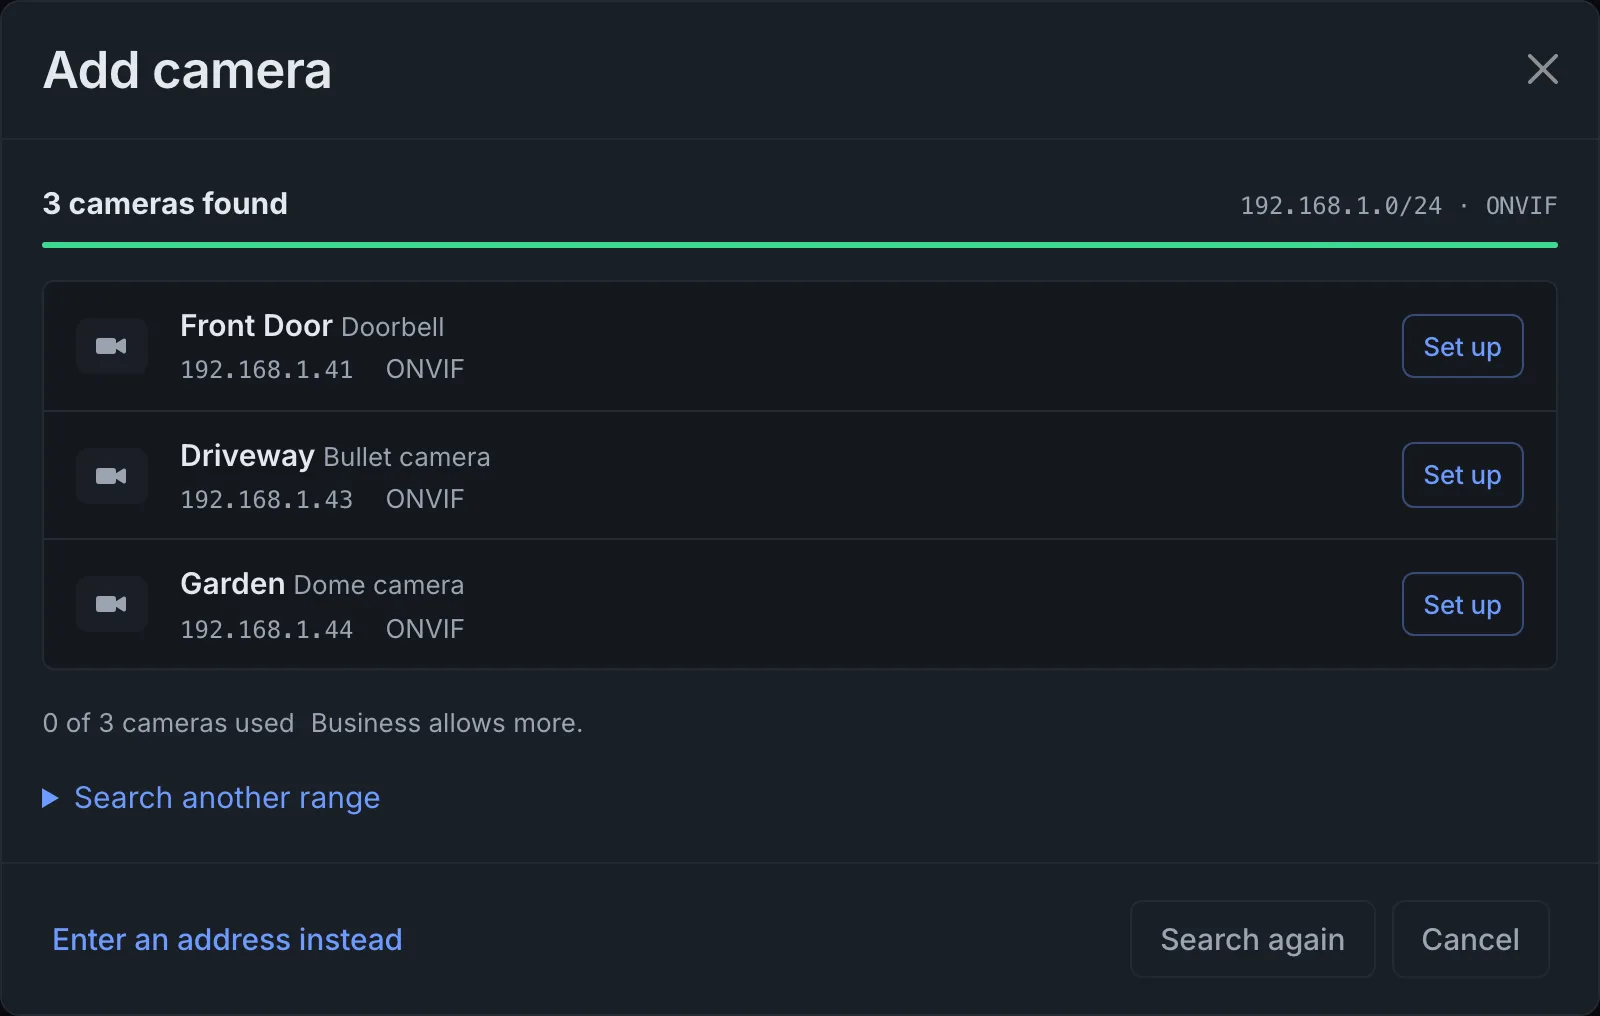
- Set up a camera from the list. Cameras you already added are marked Added.
- Sign in with the camera's own username and password.
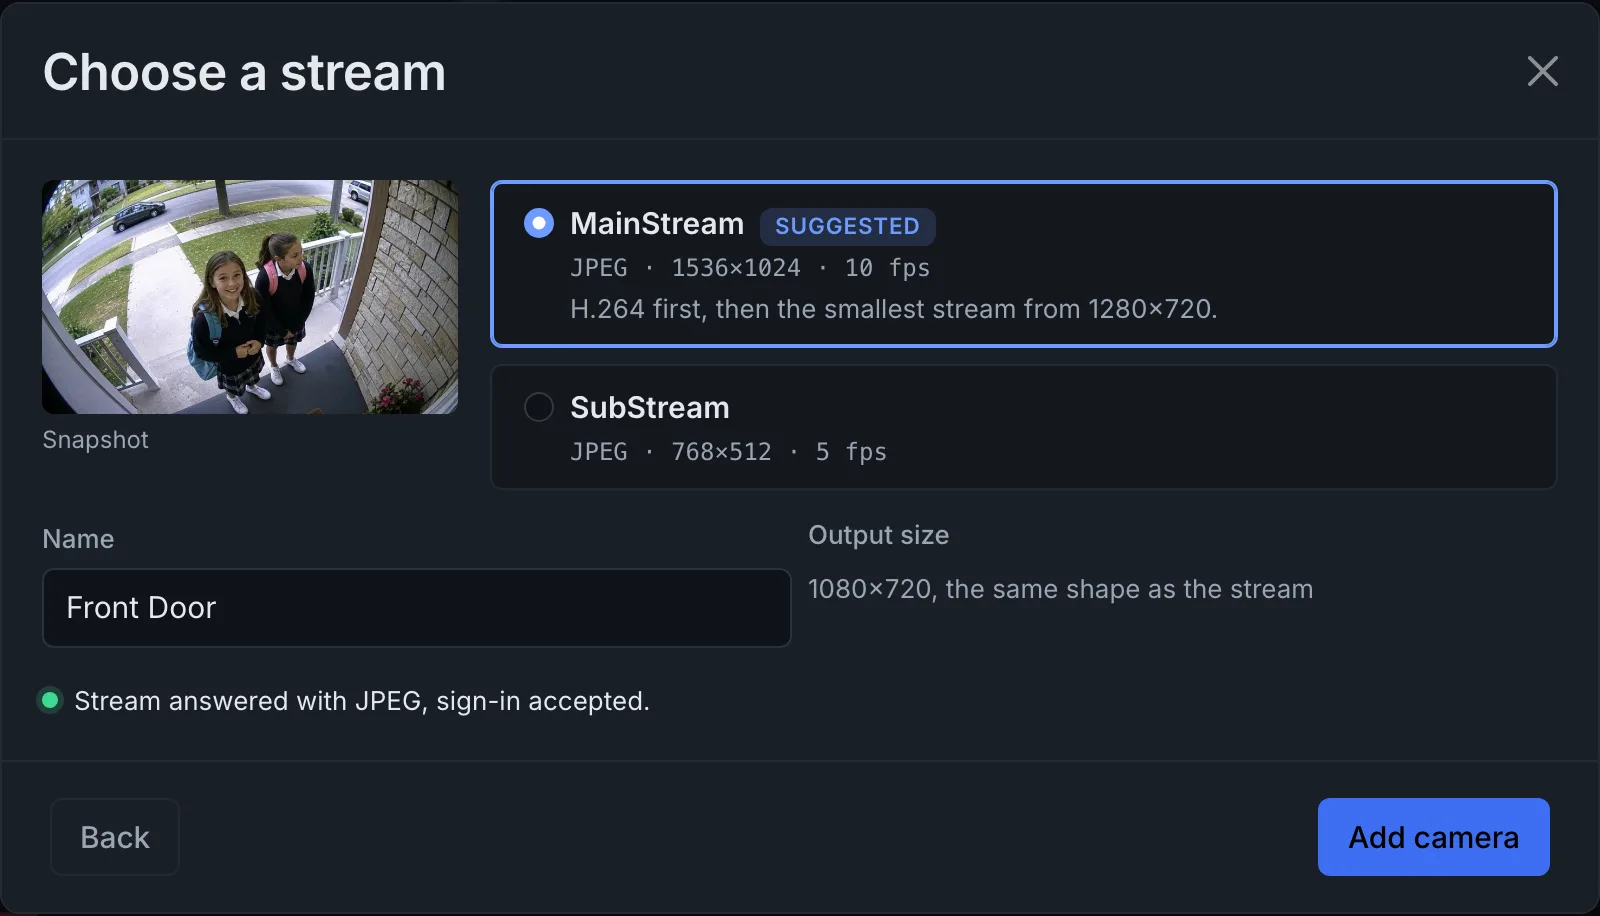
- Choose a stream. Every stream the camera offers is listed with its codec, size and frame rate, next to a snapshot. FaceStream checks that the stream answers with this sign-in, without decoding a picture.
- Add camera puts a new card into the list with the name, the Stream URL, username, password and an Output size in the shape of the stream. Save cameras starts it, as with any other change on this page.
Cameras that answer quickly appear within a fraction of a second; the search keeps listening a few seconds longer for slower ones. You can set up a camera before it finishes.
Which stream is suggested
H.264 first, then H.265, then anything else. Within the same codec, the smallest stream of at least 1280×720; if no stream is that large, use the largest one. It is a starting point. choose another stream before adding the camera if you prefer.
Output size
The shape of the chosen stream, at most 1280×720, never enlarged: a 2560×1440 stream gets 1280×720, a 2592×1944 stream 960×720, a 640×480 stream stays 640×480. The card lets you change it afterwards.
What the search finds
Cameras that speak ONVIF and sit in a network FaceStream can reach. It asks in two ways at once:
- a broadcast to its own network segment, the way ONVIF cameras expect to be found,
- a question to every address of the networks it can tell it belongs to, the network of the address you opened FaceStream with, and those of cameras and connections you already set up. At most four such networks, 254 addresses each, private ranges only (10.x.x.x, 172.16 to 31.x.x, 192.168.x.x).
Only cameras make it into the list. Other devices that answer, a NAS or a PC, are left out.
In Docker
In Docker's default bridge network, the broadcast does not reach your network, but the
question to every address does. Open FaceStream by the host's IP address, for example
http://192.168.1.20:8000, and the search knows which network to ask. If it cannot tell,
opened through a reverse proxy, with no camera set up yet, the dialog asks you for the
range.
When a camera is not listed
| Reason | What to do |
|---|---|
| ONVIF is switched off on the camera. Hikvision cameras ship with it off, some Reolink models too | Switch ONVIF on in the camera's own settings, then Search again. Hikvision also needs a separate ONVIF user there |
| The camera sits in another network or VLAN | Search another range and enter it, for example 192.168.20.0/24. Up to 1,024 addresses, private ranges only, and your network has to route there |
| The camera does not speak ONVIF, a Loxone Intercom, or a camera run by UniFi Protect | Enter an address instead and type its stream address |
When sign-in fails
The camera refused the sign-in means the username or the password is wrong, or, on Hikvision and some other brands, that ONVIF has its own user, created in the camera's settings. A camera clock that is off does not get in the way: FaceStream signs in with the camera's own time.
If the sign-in works but a stream reports The stream refused this sign-in, the camera keeps a separate user for streaming. Choose another stream, or enter the address by hand.
Enter an address
Enter an address instead in the dialog, or Enter an address on an empty camera page, adds an empty card. Type the Stream URL without username and password, those two go into their own fields:
rtsp://192.168.1.41:554/stream1
http://192.168.1.30/mjpg/video.mjpg
Stream addresses of common cameras
The usual forms, with the camera's address in place of <ip>. Firmware versions differ,
so the camera's manual or app has the last word; the main stream is the sharper one, the
sub stream costs less to process.
| Camera | Stream URL |
|---|---|
| Loxone Intercom | http://<ip>/mjpg/video.mjpg, MJPEG, with the Intercom's user and password |
| Hikvision | rtsp://<ip>:554/Streaming/Channels/101, 102 for the sub stream |
| Dahua, Amcrest | rtsp://<ip>:554/cam/realmonitor?channel=1&subtype=0, subtype=1 for the sub stream |
| Reolink | rtsp://<ip>:554/h264Preview_01_main, h264Preview_01_sub for the sub stream |
| Axis | rtsp://<ip>/axis-media/media.amp |
| TP-Link Tapo | rtsp://<ip>:554/stream1, stream2 for the sub stream, with the camera account created in the Tapo app |
| DoorBird | rtsp://<ip>:8557/mpeg/media.amp |
| UniFi Protect | Enable RTSP for the camera in Protect, then rtsp://<console ip>:7447/<alias>, the unencrypted form of the address Protect shows |
Cameras that only stream to a manufacturer's cloud, many battery cameras and cloud doorbells, have no local address FaceStream could read.
The camera card
Every camera is one card on the Camera page. Changes on it take effect with Save cameras; recognition pauses for a moment while it restarts.
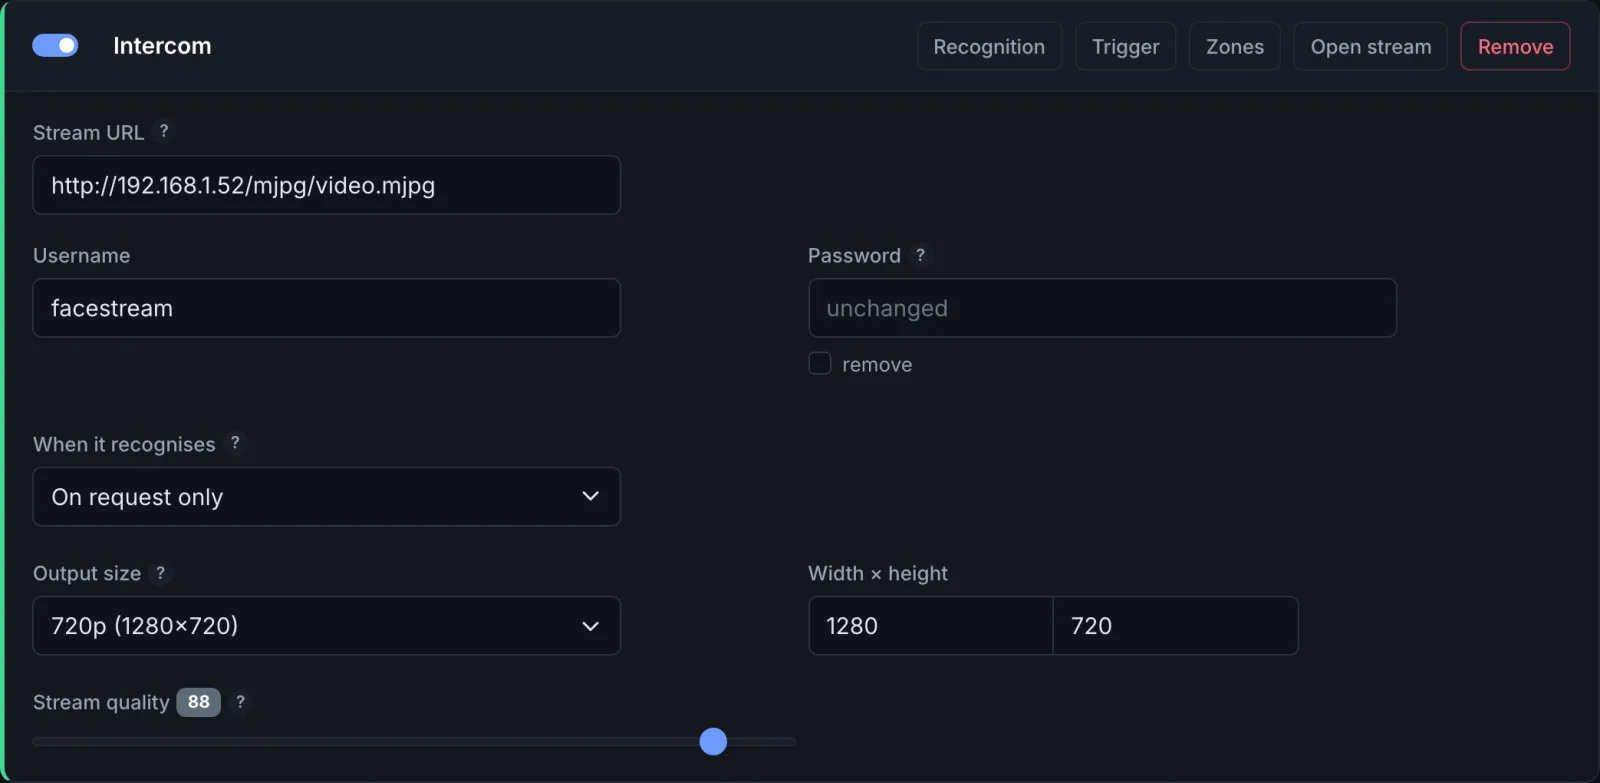
| Field | What it does |
|---|---|
| The switch next to the name | Switches the camera off without deleting it |
| Stream URL | RTSP or MJPEG over HTTP, without username or password |
| Username, Password | The camera's sign-in. The password is kept once saved; remove deletes it |
| When it recognises | Continuously, or On request only for a doorbell or a motion sensor, see Recognition and requests |
| Check every … frames | Continuously only: how often it looks for faces |
| Output size, Width × height | The size the camera is processed and streamed in. Larger frames find smaller faces and cost more processing time. A door station that delivers 640×480 gains nothing from 1080p |
| Stream quality | The JPEG quality of FaceStream's own stream. Bandwidth, not processing time: 85 is plenty on the local network |
The buttons in the header of the card:
| Button | Opens |
|---|---|
| Recognition | How this camera recognises a face: Detail, Strictness and the liveness check, see Recognition and requests |
| Trigger | The settings for a request and two addresses: the Trigger URL for a doorbell or home automation, and a Stream URL for other systems |
| Zones | The detection zones, see below |
| Open stream | The annotated picture in a new browser tab |
| Remove | Deletes the camera. Its past visits stay in the event log. A rule that listened to this camera only listens to every camera afterwards, check your rules |
Detection zones
A zone limits where in the picture a face counts. The pavement in front of the house, a
neighbour's window, a television in the room: faces there cost processing time and turn
up as Unknown. Zones are in Pro and up, five per camera in Pro.
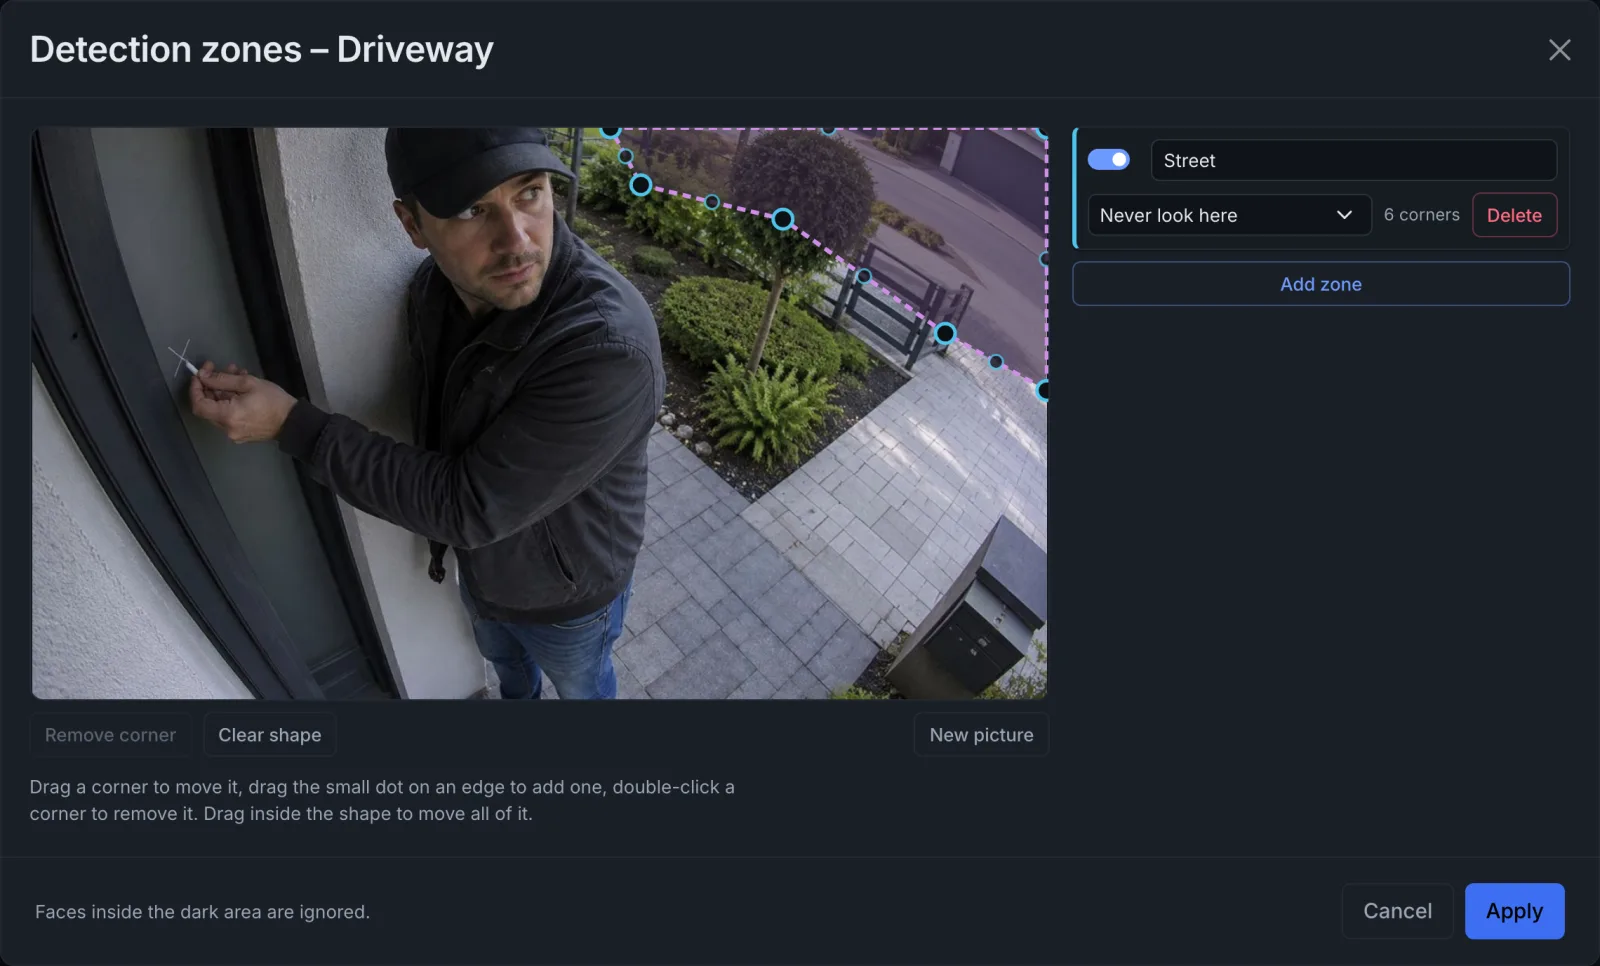
- Zones on the camera card opens the editor with a current picture of the camera. New picture fetches another one.
- Add zone, then click the corners into the picture. Drag a corner to move it, the small dot on an edge to add one; double-click a corner to remove it.
- Choose Look only here or Never look here, and give the zone a name.
- Apply, then Save cameras.
With zones of both kinds, only the bright part counts and the dark patches are cut out of it. What decides is the centre of a face: somebody at the edge of a zone counts if the middle of their face is inside.
The picture in other systems
Open stream shows the annotated picture: the face marks of recognition, green with a
name, orange for Unknown, red for a face held up on a screen or paper. With On request
only, the marks appear only while a request is running.
A dashboard, a wall panel or another program cannot sign in, so it uses the Stream URL for other systems from the camera's Trigger dialog instead. It carries a token and shows the picture, nothing else:
http://192.168.1.20:8100/stream/front-door?token=…
Anyone who has this address can watch, so treat it like a key. New stream token in the same dialog withdraws it; the old address stops working once you save. Home Assistant shows how to put it on a dashboard.