Getting started
Getting started
Install FaceStream.AI with Docker, add your first camera, enrol a person and send a first message to Home Assistant, Loxone or your phone.
On this page
FaceStream.AI recognises the people you enrol in the pictures of the cameras you already have, and tells your home automation who is there: Home Assistant, Loxone, KNX, MQTT, a webhook or your phone. It runs on your own hardware, on the processor, without a cloud account.
This page takes you from nothing to a first recognised face and a first message. Plan a quarter of an hour, most of it for choosing good photos.
FaceStream.AI reports; your home automation decides. It never opens a door by itself, it tells the system that does.
What you need
- A machine that runs Docker, or a 64-bit Linux: a NAS such as a Synology or QNAP, a mini PC, a home server, a Raspberry Pi 5. Installation covers each of them, and the system requirements say how much hardware each edition needs.
- A camera that delivers RTSP or MJPEG. Most IP cameras and video doorbells do, and so does the Loxone Intercom.
- One or two clear photos of each person who should be recognised.
The Free edition covers one camera, three people and one rule, and sends its messages as UDP. Home Assistant, Loxone, MQTT, push messages, more cameras and recognition at the press of a doorbell come with a Pro licence, see Editions and licence.
Step 1: Start FaceStream.AI
On a machine with Docker:
docker run -d --name facestream \
  -p 8000:8000 -p 8100:8100 \
  -v facestream-data:/data \
  -e TZ=Europe/Berlin \
  --restart unless-stopped \
  kumkju/facestream:latest
Replace Europe/Berlin with your own time zone; without it, every time in a message is in
UTC. Port 8000 is the interface, port 8100 the video stream and the address your doorbell
or home automation calls. Everything FaceStream.AI stores lands in the volume
facestream-data.
On a NAS, use its container manager instead. Installation has the steps for Synology, QNAP and Unraid, and for Linux without Docker.
Step 2: Choose a password
Open the interface in a browser by the machine's IP address, for example
http://192.168.1.20:8000. Not localhost, and not a name only your own computer knows:
the camera search works out from this address which network to look in, and the links in
messages and in Home Assistant point to it.
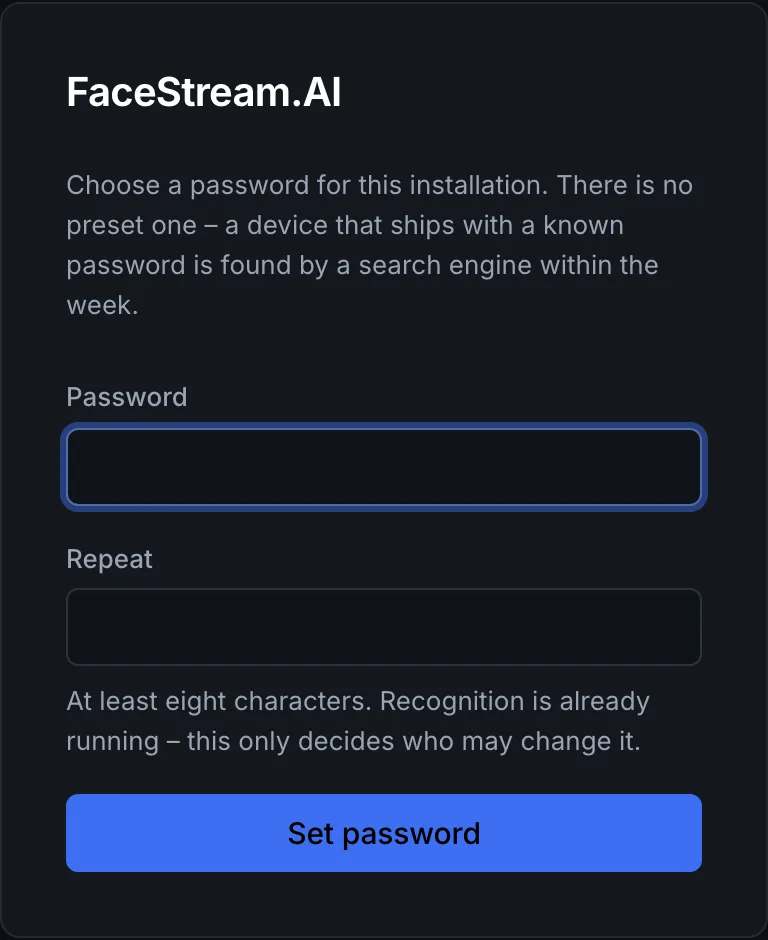
There is no preset password. Choose one with at least eight characters; recognition does not wait for it, the password only decides who may change the settings.
Step 3: Add your first camera
Open Camera and press Search for cameras. FaceStream.AI looks for cameras that speak ONVIF in your network, and lists them after a few seconds.
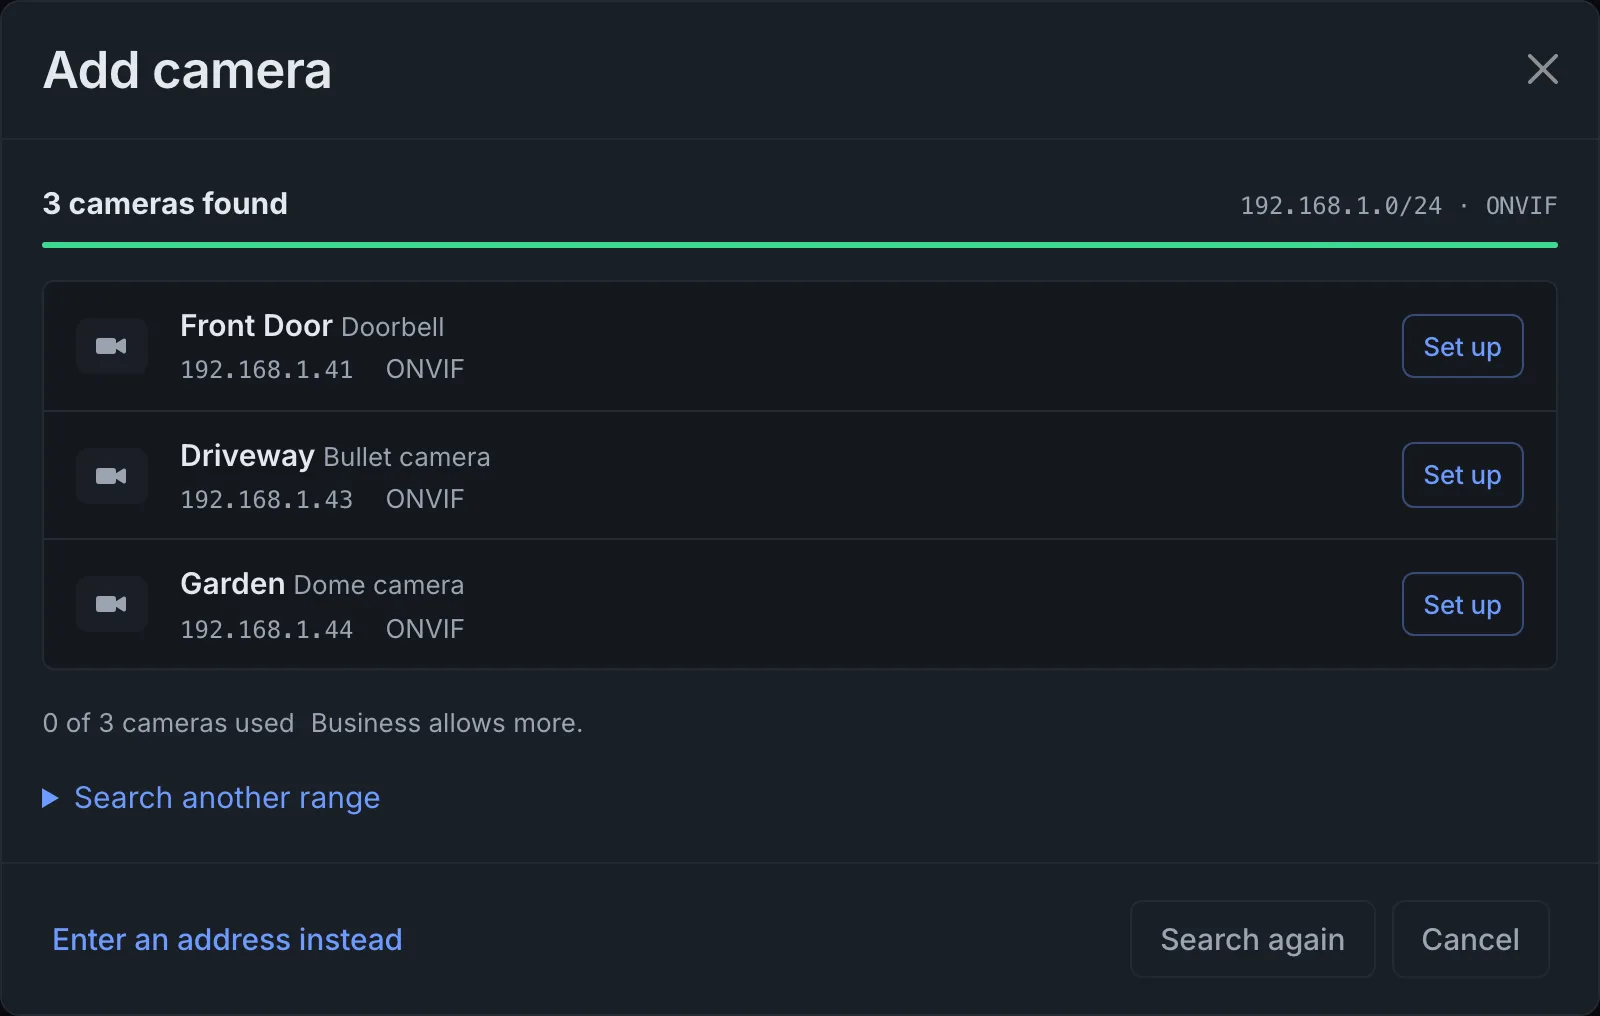
- Set up the camera you want.
- Sign in with the camera's own username and password, the ones you use in the camera's app or web page.
- Choose a stream. FaceStream.AI suggests one; the suggestion is usually right.
- Add camera, then Save cameras.
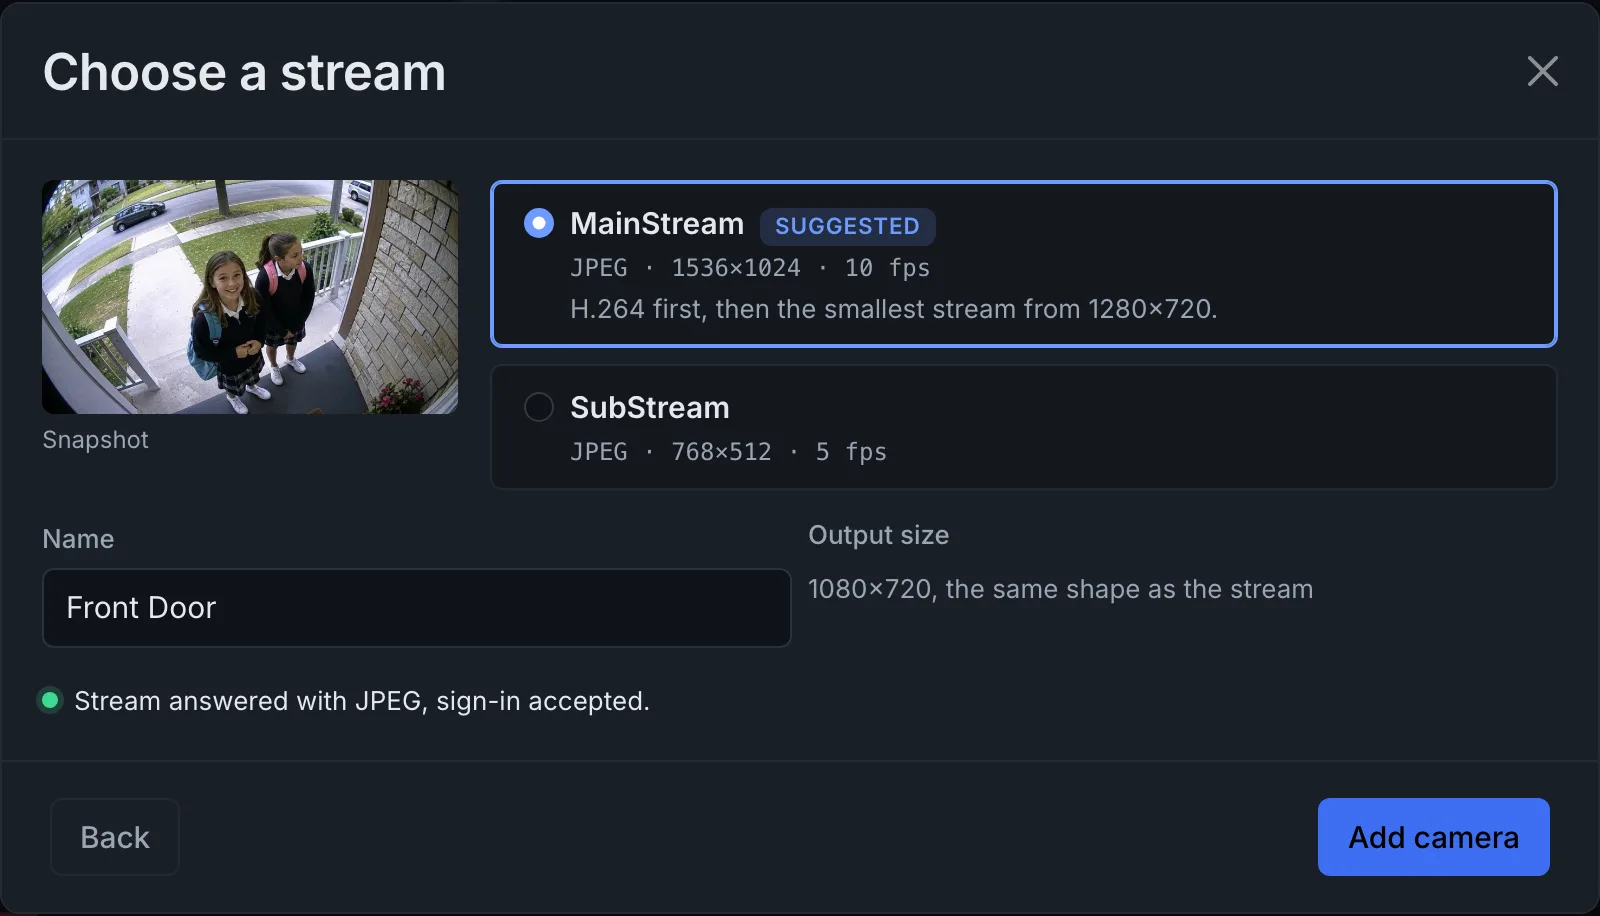
Not every camera is found this way. A Loxone Intercom, a camera behind UniFi Protect or one with ONVIF switched off needs its stream address typed in: Enter an address instead. Adding a camera has the addresses of common brands and what to do when a camera is not listed.
Step 4: Add the people to recognise
Open People, type a name into Add photos for, and drop one or more photos onto the field below it.
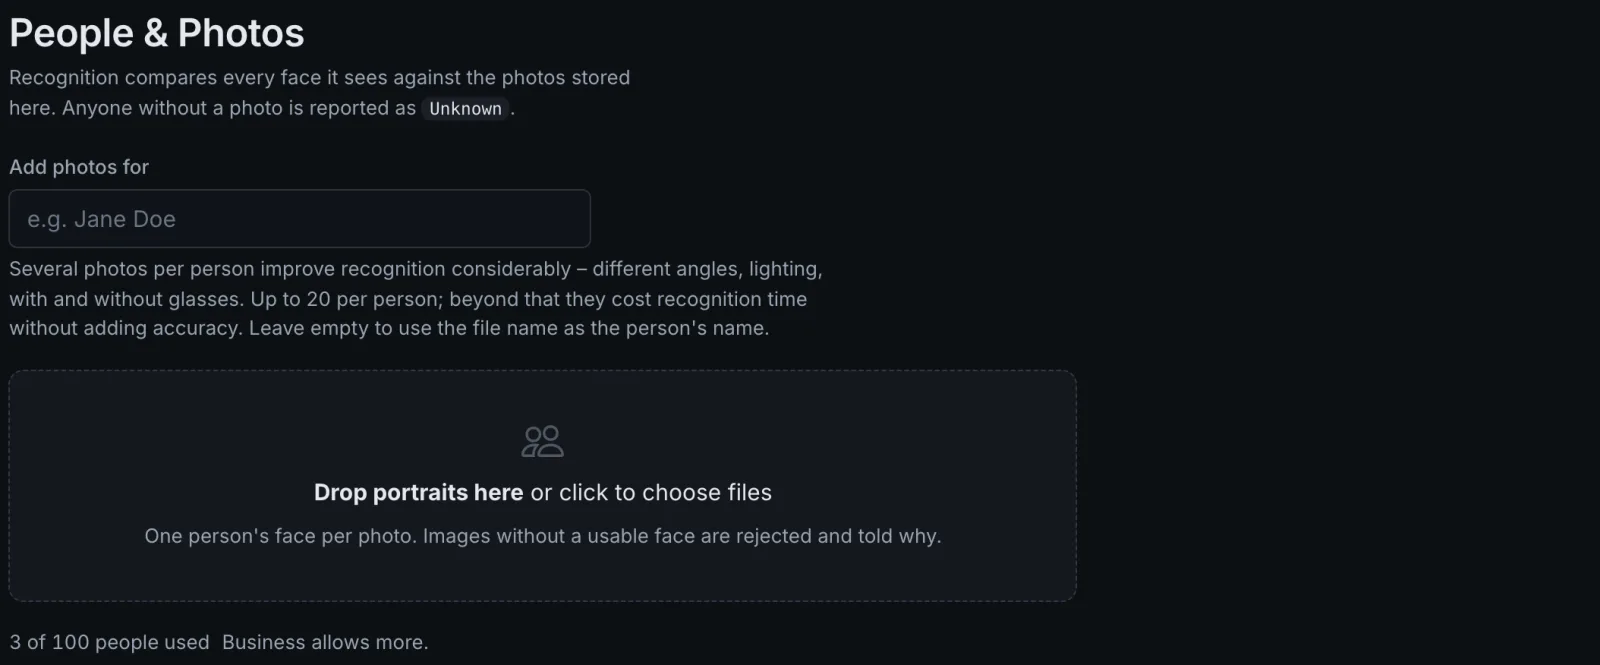
Photos that work well:
- the face looking roughly into the camera, not in profile
- sharp and evenly lit, no sunglasses, nothing covering the face
- one person per photo, a group photo is rejected
Two or three photos from different angles and in different light recognise noticeably better than one. Every photo is checked when you add it; one without a usable face is refused, with the reason. People and photos has more on this.
Step 5: Watch it recognise
A camera you have just added recognises continuously: it checks the picture every 60 frames, every few seconds, for faces. Walk up to it.
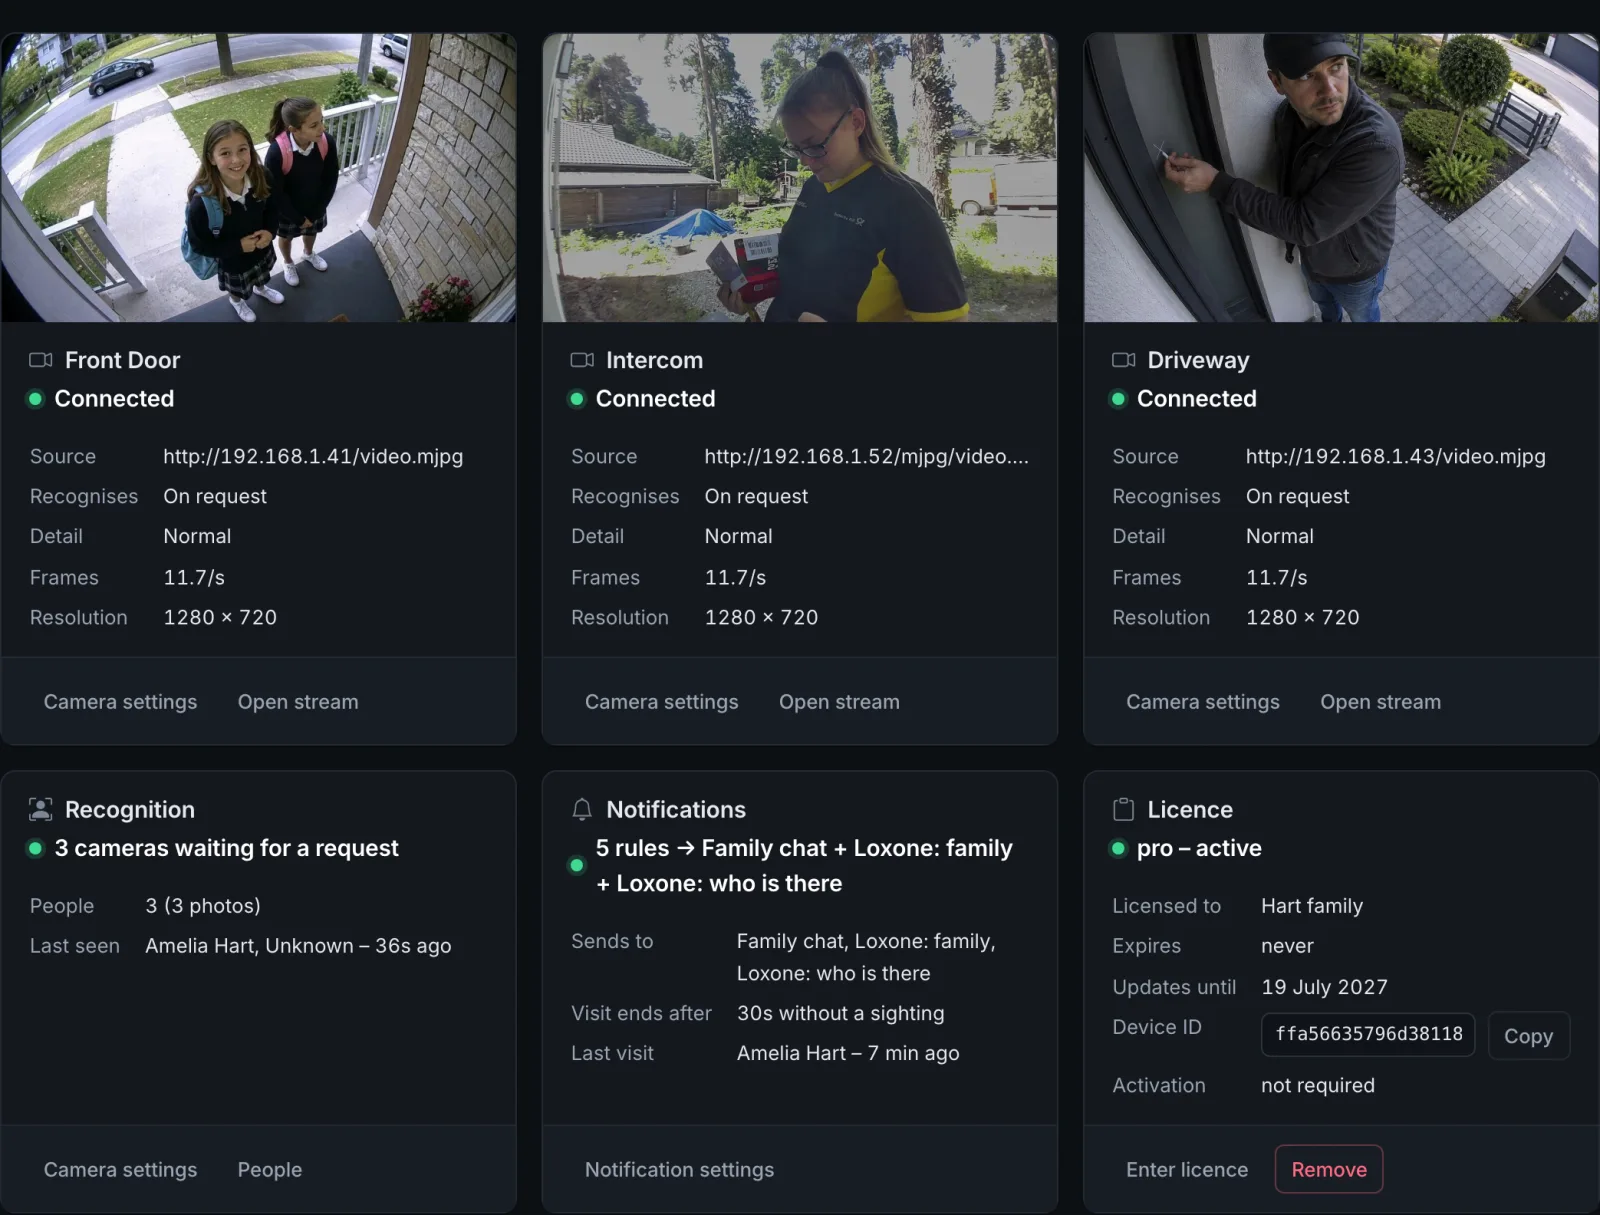
The Overview shows every camera with its live picture, whether it is connected and how many frames it delivers, and under Recognition who was seen last.
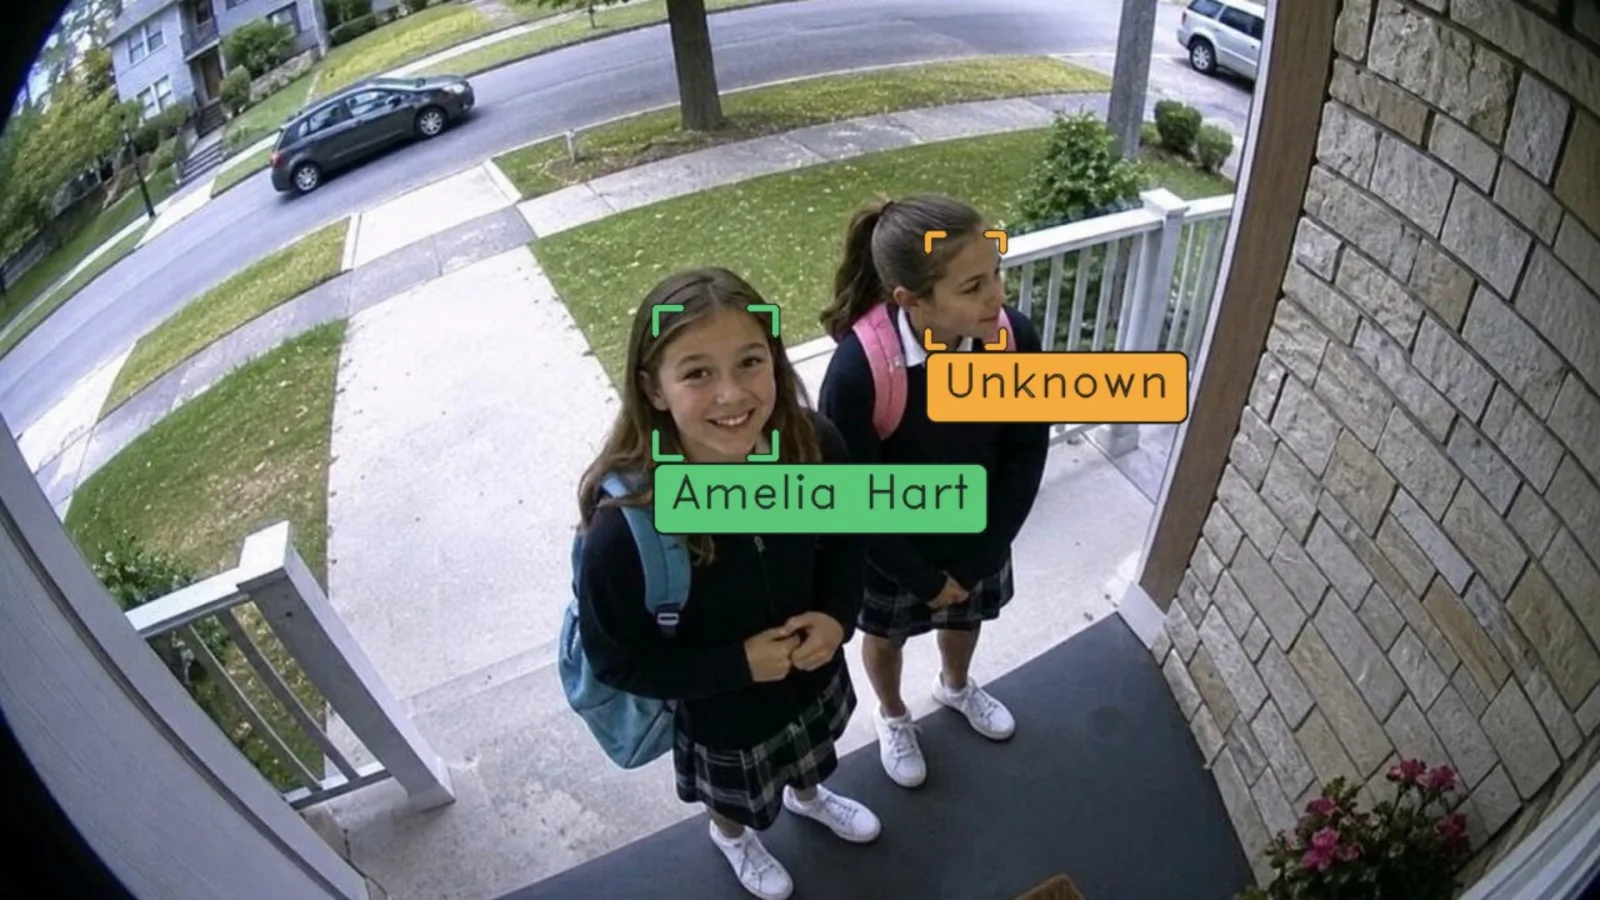
Open stream on a camera card shows what the camera sees, with the faces marked: green
with the name for somebody you enrolled, orange for Unknown, red for a face held up to
the camera on a screen or on paper.
Recognised somebody who should have been Unknown, or the other way round? Better photos
fix most of it; Recognition and requests
explains the settings for the rest.
Step 6: Send your first message
A message needs two things: a connection that says where it goes, and a rule that says when. Without a rule nothing is sent, however many connections exist.
- Open Notifications and choose Add connection. In the Free edition that is UDP; with Pro you can pick MQTT for Home Assistant, Loxone, Telegram and more.
- Fill in the address and press Test. A message for the name FaceStream test goes out straight away, before anything is saved, and a short note on the screen says whether it was delivered or what went wrong.
- Add rule. Under When, choose the Event Visit starts; with Pro, set Who to Known people, in Free a rule reacts to anyone. Under Then, Add action and pick your connection.
- Save connections and rules. Rules take effect immediately.
Now walk up to the camera again. Connections and rules explains every field, and the pages on Home Assistant and Loxone walk through the most common setups.
Step 7: Look back at what happened
Events lists every visit: who, at which camera, when and for how long, with the photo. Somebody standing at the door for two minutes is one visit, not two hundred sightings.
Notifications → Recent deliveries, at the bottom of the page, shows every message that went out and what the other side answered. When something does not arrive, the reason is usually in that answer.
Where to go from here
- Home Assistant: switch on Home Assistant discovery in an MQTT connection and every camera appears as a device. Face recognition in Home Assistant explains how.
- Loxone: the Intercom as a camera, the bell as the trigger, the name on the Miniserver. Face recognition with Loxone explains how.
- A doorbell: let the camera recognise only when somebody rings, with On request only. Recognition and requests explains how.
- Ideas: smart home, hotels and security, each with the settings that make them work.